

OpenAPI到模型上下文协议(MCP)
](https://badge.fury.io/py/openapi-mcp-proxy)  


OpenAPI MCP代理将OpenAPI规范转换为MCP工具,使AI代理能够访问外部API,而无需自定义包装器!
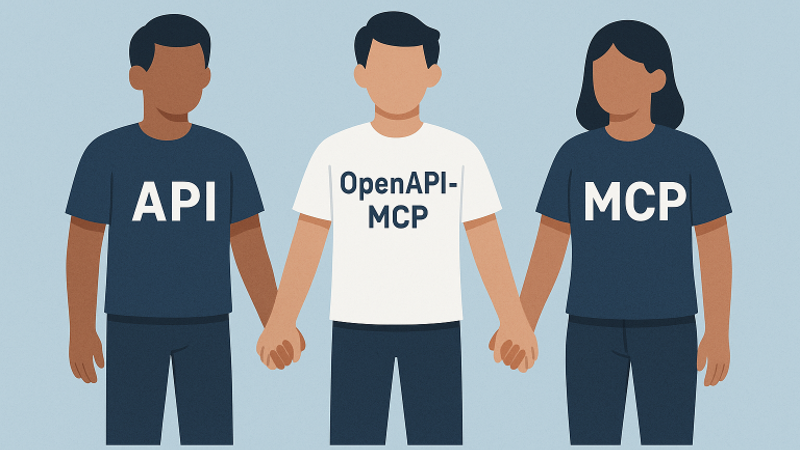
弥合AI代理和外部API之间的差距
OpenAPI到模型上下文协议(MCP)代理服务器通过以下方式弥合了AI代理和外部API之间的差距 动态翻译 OpenAPI规范标准化 MCP工具, 资源,以及 提示。这消除了对自定义API包装器的需要,从而简化了集成。
内置于 FastMCP 遵循官方的MCP模式和最佳实践,服务器提供:
- ✅ 官方FastMCP集成 -使用最新的FastMCP框架实现最佳性能
- ✅ 正确的MCP运输 -支持stdio、SSE和流式HTTP传输
- ✅ 模块化架构 -通过依赖注入实现关注点的清晰分离
- ✅ 生产就绪 -强大的错误处理、全面的日志记录和类型安全
- 存储库:
______________________________________________________________________
如果你觉得它有用,请给它一个⭐ 在GitHub上!
______________________________________________________________________
主要特点
核心功能
- FastMCP传输: 优化为
stdio,与流行的LLM管弦乐队合作。 - OpenAPI集成: 将OpenAPI操作解析并注册为可调用工具。
- 资源注册: 自动将OpenAPI组件模式转换为具有定义URI的资源对象。
- 提示生成: 基于API操作生成上下文提示,以指导LLM使用API。
- 双重身份验证: 支持OAuth2客户端凭据流和具有自动令牌缓存的用户名/密码身份验证。
- MCP HTTP传输: 通过SSE使用JSON-RPC 2.0的官方MCP兼容HTTP流传输。
- 服务器发送事件(SSE): 传统流媒体支持(已弃用-使用MCP HTTP传输)。
- JSON-RPC 2.0支持: 完全符合要求的请求/响应结构。
高级功能
- 模块化架构: 通过用于身份验证、请求处理和工具生成的专用模块实现关注点的清晰分离。
- 稳健的错误处理: 具有适当JSON-RPC错误代码和结构化错误响应的全面异常层次结构。
- 自动元数据: 从OpenAPI规范中导出工具名称、摘要和模式。
- 山宁泰工具名称: 确保与MCP名称约束的兼容性。
- 灵活的参数解析: 支持查询字符串、JSON和逗号分隔格式,具有智能类型转换功能。
- 增强的参数处理: 通过验证自动将参数转换为正确的数据类型。
- 扩展工具元数据: 包括详细的参数信息、响应架构和API分类。
- CRUD操作检测: 自动识别并生成创建、读取、更新、删除操作的示例提示。
- 符合MCP标准的流媒体: 用于实时流媒体的官方MCP HTTP传输,具有适当的会话管理功能。
开发者体验
- 配置管理: 具有验证和默认值的集中式环境变量处理。
- 综合日志记录: 结构化日志记录,具有适当的调试和监控级别。
- 类型安全: 整个代码库中的完整类型提示和验证。
- 可扩展设计: 工厂模式和依赖注入,便于定制和测试。
🚀 快速开始
安装
选项1:使用uvx(推荐)
# Run directly without installation
uvx openapi-mcp-proxy

# Or with environment variables
OPENAPI_URL="https://api.met.no/weatherapi/locationforecast/2.0/swagger" \
SERVER_NAME="weather" \
uvx openapi-mcp-proxy
选项2:使用pip
pip install openapi-mcp-proxy

# Then run
OPENAPI_URL="https://api.met.no/weatherapi/locationforecast/2.0/swagger" \
SERVER_NAME="weather" \
openapi-mcp
选项3:来源
git clone https://github.com/gujord/OpenAPI-MCP.git
cd OpenAPI-MCP
python3.12 -m venv venv
source venv/bin/activate  # On Windows: venv\Scripts\activate
pip install -e .
🎯 使用简单
快速测试(挪威天气API)
# Using uvx
OPENAPI_URL="https://api.met.no/weatherapi/locationforecast/2.0/swagger" \
SERVER_NAME="weather" \
uvx openapi-mcp

# Or using installed package
OPENAPI_URL="https://api.met.no/weatherapi/locationforecast/2.0/swagger" \
SERVER_NAME="weather" \
openapi-mcp
HTTP传输(建议用于Claude Desktop)
# Start weather API with HTTP transport
OPENAPI_URL="https://api.met.no/weatherapi/locationforecast/2.0/swagger" \
SERVER_NAME="weather" \
MCP_HTTP_ENABLED="true" \
MCP_HTTP_PORT="8001" \
openapi-mcp
🔗 Claude桌面设置
1.复制提供的配置:
cp claude_desktop_config.json ~/Library/Application\ Support/Claude/claude_desktop_config.json2.启动天气服务器:
OPENAPI_URL="https://api.met.no/weatherapi/locationforecast/2.0/swagger" \
SERVER_NAME="weather" \
MCP_HTTP_ENABLED="true" \
MCP_HTTP_PORT="8001" \
openapi-mcp
3.在Claude Desktop中测试:
- 问: *“奥斯陆明天的天气怎么样?”*
- 克劳德将使用
weather_get__compact工具自动!
🌐 多个API服务器
同时运行多个OpenAPI服务:
# Terminal 1: Weather API
source venv/bin/activate && \
OPENAPI_URL="https://api.met.no/weatherapi/locationforecast/2.0/swagger" \
SERVER_NAME="weather" \
MCP_HTTP_ENABLED="true" \
MCP_HTTP_PORT="8001" \
python src/openapi_mcp/fastmcp_server.py

# Terminal 2: Petstore API
source venv/bin/activate && \
OPENAPI_URL="https://petstore3.swagger.io/api/v3/openapi.json" \
SERVER_NAME="petstore" \
MCP_HTTP_ENABLED="true" \
MCP_HTTP_PORT="8002" \
python src/openapi_mcp/fastmcp_server.py
🐳 Docker部署
Docker快速入门:
# Start all services (weather + petstore)
./docker-start.sh

# Or manually
docker-compose up --build -d
这将自动运行:
- 端口8001上的天气API
- 端口8002上的Petstore API
⚙️ 高级配置
克劳德桌面/光标/风帆
HTTP传输(推荐):
使用提供的配置文件:
cp claude_desktop_config.json ~/Library/Application\ Support/Claude/claude_desktop_config.json或手动创建:
{
  "mcpServers": {
    "weather": {
      "command": "npx",
      "args": ["mcp-remote", "http://127.0.0.1:8001/sse"]
    },
    "petstore": {
      "command": "npx",
      "args": ["mcp-remote", "http://127.0.0.1:8002/sse"]
    }
  }
}
标准运输(替代方案):
{
  "mcpServers": {
    "weather": {
      "command": "/full/path/to/OpenAPI-MCP/venv/bin/python",
      "args": ["/full/path/to/OpenAPI-MCP/src/openapi_mcp/fastmcp_server.py"],
      "env": {
        "SERVER_NAME": "weather",
        "OPENAPI_URL": "https://api.met.no/weatherapi/locationforecast/2.0/swagger"
      },
      "transport": "stdio"
    }
  }
}
注: 替换 /full/path/to/OpenAPI-MCP 使用您的实际安装路径。具有本地规范和自定义标头
{
  "mcpServers": {
    "local_api": {
      "command": "/full/path/to/OpenAPI-MCP/venv/bin/python",
      "args": ["/full/path/to/OpenAPI-MCP/src/openapi_mcp/fastmcp_server.py"],
      "env": {
        "SERVER_NAME": "local_api",
        "OPENAPI_URL": "./specs/my-api.yaml",
        "MCP_AUTH_HEADERS": "{\"X-API-Key\": \"your-key-here\"}"
      },
      "transport": "stdio"
    }
  }
}
使用用户名/密码验证
{
  "mcpServers": {
    "secure_api": {
      "command": "full_path_to_openapi_mcp/venv/bin/python",
      "args": ["full_path_to_openapi_mcp/src/openapi_mcp/fastmcp_server.py"],
      "env": {
        "SERVER_NAME": "secure_api",
        "OPENAPI_URL": "https://api.example.com/openapi.json",
        "API_USERNAME": "your_username",
        "API_PASSWORD": "your_password"
      },
      "transport": "stdio"
    }
  }
}
使用OAuth2身份验证
{
  "mcpServers": {
    "oauth_api": {
      "command": "full_path_to_openapi_mcp/venv/bin/python",
      "args": ["full_path_to_openapi_mcp/src/openapi_mcp/fastmcp_server.py"],
      "env": {
        "SERVER_NAME": "oauth_api",
        "OPENAPI_URL": "https://api.example.com/openapi.json",
        "OAUTH_CLIENT_ID": "your_client_id",
        "OAUTH_CLIENT_SECRET": "your_client_secret",
        "OAUTH_TOKEN_URL": "https://api.example.com/oauth/token"
      },
      "transport": "stdio"
    }
  }
}
具有MCP HTTP传输的多个API服务器
配置多个OpenAPI服务以同时运行:
{
  "mcpServers": {
    "weather": {
      "command": "npx",
      "args": [
        "mcp-remote",
        "http://127.0.0.1:8001/sse"
      ]
    },
    "petstore": {
      "command": "npx",
      "args": [
        "mcp-remote",
        "http://127.0.0.1:8002/sse"
      ]
    }
  }
}
此配置使Claude可以同时访问天气数据和petstore API工具,并使用类似 weather_get__compact 和 petstore_addPet.
带有MCP HTTP传输的单个API服务器
对于单个API服务:
标准SSE配置:
{
  "mcpServers": {
    "openapi_service": {
      "command": "npx",
      "args": [
        "mcp-remote",
        "http://127.0.0.1:8001/sse"
      ]
    }
  }
}
流式HTTP配置:
{
  "mcpServers": {
    "openapi_service": {
      "command": "npx",
      "args": [
        "mcp-remote",
        "http://127.0.0.1:8001/mcp"
      ]
    }
  }
}
使用调试(用于开发):
{
  "mcpServers": {
    "openapi_service": {
      "command": "npx",
      "args": [
        "mcp-remote",
        "http://127.0.0.1:8001/sse",
        "--debug"
      ]
    }
  }
}
采用定制运输策略:
{
  "mcpServers": {
    "openapi_service": {
      "command": "npx",
      "args": [
        "mcp-remote",
        "http://127.0.0.1:8001/mcp",
        "--transport",
        "streamable-http"
      ]
    }
  }
}
使用旧式SSE流媒体(已弃用)
{
  "mcpServers": {
    "streaming_api": {
      "command": "full_path_to_openapi_mcp/venv/bin/python",
      "args": ["full_path_to_openapi_mcp/src/openapi_mcp/fastmcp_server.py"],
      "env": {
        "SERVER_NAME": "streaming_api",
        "OPENAPI_URL": "https://api.example.com/openapi.json",
        "SSE_ENABLED": "true",
        "SSE_HOST": "127.0.0.1",
        "SSE_PORT": "8001"
      },
      "transport": "stdio"
    }
  }
}
将此配置应用于以下文件:
- 光标:
~/.cursor/mcp.json - 风浪:
~/.codeium/windsurf/mcp_config.json - 克劳德桌面:
~/Library/Application Support/Claude/claude_desktop_config.json
替换 full_path_to_openapi_mcp 使用您的实际安装路径。快速设置多个API
复制提供的示例配置:
cp claude_desktop_config.json ~/Library/Application\ Support/Claude/claude_desktop_config.json启动这两项服务:
# Terminal 1
source venv/bin/activate && \
OPENAPI_URL="https://api.met.no/weatherapi/locationforecast/2.0/swagger" \
SERVER_NAME="weather" \
MCP_HTTP_ENABLED="true" \
MCP_HTTP_PORT="8001" \
python src/openapi_mcp/fastmcp_server.py

# Terminal 2
source venv/bin/activate && \
OPENAPI_URL="https://petstore3.swagger.io/api/v3/openapi.json" \
SERVER_NAME="petstore" \
MCP_HTTP_ENABLED="true" \
MCP_HTTP_PORT="8002" \
python src/openapi_mcp/fastmcp_server.py
结果:Claude可以访问带有前缀工具名称的天气和宠物商店API。
环境配置
核心配置
| 变量 | 描述 | 必填 | 默认 |
|---|---|---|---|
OPENAPI_URL | OpenAPI规范的URL或本地文件路径 | 是 | - |
SERVER_NAME | MCP服务器名称 | 否 | openapi_proxy_server |
OAuth2身份验证
| 变量 | 描述 | 必填 | 默认 |
|---|---|---|---|
OAUTH_CLIENT_ID | OAuth客户端ID | 否 | - |
OAUTH_CLIENT_SECRET | OAuth客户端机密 | 否 | - |
OAUTH_TOKEN_URL | OAuth令牌端点URL | 否 | - |
OAUTH_SCOPE | OAuth范围 | 否 | api |
用户名/密码验证
| 变量 | 描述 | 必填 | 默认 |
|---|---|---|---|
API_USERNAME | 用于身份验证的API用户名 | 否 | - |
API_PASSWORD | 用于身份验证的API密码 | 否 | - |
API_LOGIN_ENDPOINT | 登录端点URL | 否 | 自动检测到 |
自定义身份验证标头
| 变量 | 描述 | 必填 | 默认 |
|---|---|---|---|
MCP_AUTH_HEADERS | 自定义身份验证标头(JSON或key=value格式) | 否 | - |
MCP HTTP传输(推荐)
| 变量 | 描述 | 必填 | 默认 |
|---|---|---|---|
MCP_HTTP_ENABLED | 启用MCP HTTP传输 | 否 | false |
MCP_HTTP_HOST | MCP HTTP服务器主机 | 否 | 127.0.0.1 |
MCP_HTTP_PORT | MCP HTTP服务器端口 | 否 | 8000 |
MCP_CORS_ORIGINS | CORS来源(逗号分隔) | 否 | * |
MCP_MESSAGE_SIZE_LIMIT | 邮件大小限制 | 否 | 4mb |
MCP_BATCH_TIMEOUT | 批处理超时(秒) | 否 | 30 |
MCP_SESSION_TIMEOUT | 会话超时(秒) | 否 | 3600 |
传统SSE支持(已弃用)
| 变量 | 描述 | 必填 | 默认 |
|---|---|---|---|
SSE_ENABLED | 启用SSE流媒体支持 | 否 | false |
SSE_HOST | SSE服务器主机 | 否 | 127.0.0.1 |
SSE_PORT | SSE服务器端口 | 否 | 8000 |
📁 加载本地OpenAPI规范
现在,您可以从本地文件系统加载OpenAPI规范,而不需要远程URL:
JSON格式
source venv/bin/activate
OPENAPI_URL="./specs/my-api.json" \
SERVER_NAME="local_api" \
python src/openapi_mcp/fastmcp_server.py
YAML格式
source venv/bin/activate
OPENAPI_URL="../shared/api.yaml" \
SERVER_NAME="local_api" \
python src/openapi_mcp/fastmcp_server.py
绝对路径
source venv/bin/activate
OPENAPI_URL="/Users/myuser/projects/api-spec.json" \
SERVER_NAME="local_api" \
python src/openapi_mcp/fastmcp_server.py
支持格式
- JSON文件:
.json扩展 - YAML文件:
.yaml或.yml扩展 - 相对路径:
./path/to/spec.yaml,../spec.json - 绝对路径:
/full/path/to/spec.yaml
🔑 API密钥和自定义标头
支持需要自定义头(API密钥、令牌等)的API:
使用JSON格式
source venv/bin/activate
MCP_AUTH_HEADERS='{"X-API-Key": "your-api-key", "X-Client-ID": "client123"}' \
OPENAPI_URL="https://api.example.com/openapi.json" \
SERVER_NAME="custom_api" \
python src/openapi_mcp/fastmcp_server.py
使用简单格式
source venv/bin/activate
MCP_AUTH_HEADERS='X-API-Key=your-api-key,X-Client-ID=client123' \
OPENAPI_URL="https://api.example.com/openapi.json" \
SERVER_NAME="custom_api" \
python src/openapi_mcp/fastmcp_server.py
常见的API密钥模式
- 拉皮达皮:
MCP_AUTH_HEADERS='{"X-RapidAPI-Key": "your-key"}' - 定制轴承:
MCP_AUTH_HEADERS='{"Authorization": "Bearer custom-token"}' - 多个标题:
MCP_AUTH_HEADERS='{"X-API-Key": "key", "X-API-Secret": "secret"}'
本地规范+自定义标头
结合这两个功能进行开发:
source venv/bin/activate
OPENAPI_URL="./test/fixtures/api.json" \
MCP_AUTH_HEADERS='{"X-API-Key": "dev-key"}' \
SERVER_NAME="dev_api" \
python src/openapi_mcp/fastmcp_server.py
🛠️ 示例和用例
挪威天气API
使用真实天气数据进行测试(无需身份验证):
# Start weather server
source venv/bin/activate && \
OPENAPI_URL="https://api.met.no/weatherapi/locationforecast/2.0/swagger" \
SERVER_NAME="weather" \
MCP_HTTP_ENABLED="true" \
MCP_HTTP_PORT="8001" \
python src/openapi_mcp/fastmcp_server.py
可用工具:
weather_get__compact-坐标的天气预报weather_get__complete-详细的天气预报weather_get__status-服务器状态
Claude中的示例用法:
- *“奥斯陆明天的天气怎么样?”* → 使用lat=59.9139,lon=10.7522
- *“显示卑尔根的详细天气”* → 使用lat=60.3913,lon=5.3221
API宠物店
使用Swagger的演示API进行测试:
# Start petstore server
source venv/bin/activate && \
OPENAPI_URL="https://petstore3.swagger.io/api/v3/openapi.json" \
SERVER_NAME="petstore" \
MCP_HTTP_ENABLED="true" \
MCP_HTTP_PORT="8002" \
python src/openapi_mcp/fastmcp_server.py
可用工具:
petstore_addPet-将新宠物添加到商店petstore_findPetsByStatus-按状态查找宠物petstore_getPetById-通过ID查找宠物
🏗️ 建筑
基于FastMCP的设计
src/
├── fastmcp_server.py      # FastMCP-based main server (recommended)
├── server.py              # Legacy MCP server (fallback)
├── config.py              # Configuration management
├── auth.py                # OAuth authentication handling
├── openapi_loader.py      # OpenAPI spec loading and parsing
├── request_handler.py     # Request preparation and validation
├── schema_converter.py    # Schema conversion utilities
├── exceptions.py          # Custom exception hierarchy
└── __init__.py           # Package initialization
主要特点
✅ FastMCP集成 -使用最新的FastMCP框架\ ✅ 自动工具注册 -将OpenAPI操作转换为MCP工具\ ✅ 多运输支持 -stdio、HTTP、SSE\ ✅ 参数验证 -类型转换和验证\ ✅ 错误处理 -全面的JSON-RPC错误响应\ ✅ 认证 -OAuth2和用户名/密码支持
运作原理
- 配置加载: 验证环境变量和服务器配置。
- OpenAPI规范加载: 通过全面的错误处理来获取和解析OpenAPI规范。
- 组件初始化: 使用依赖注入设置模块化组件。
- 工具注册: 使用完整元数据从OpenAPI操作动态创建MCP工具。
- 资源注册: 将OpenAPI模式转换为具有适当URI的MCP资源。
- 提示生成: 创建上下文使用提示和CRUD操作示例。
- 身份验证: 通过令牌缓存和自动续订处理OAuth2和用户名/密码身份验证。
- 请求处理: 高级参数解析、类型转换和验证。
- 错误处理: 具有结构化错误响应的全面异常处理。
sequenceDiagram
    participant LLM as LLM (Claude/GPT)
    participant MCP as OpenAPI-MCP Proxy
    participant API as External API

    Note over LLM, API: Communication Process

    LLM->>MCP: 1. Initialize (initialize)
    MCP-->>LLM: Metadata, tools, resources, and prompts

    LLM->>MCP: 2. Request tools (tools_list)
    MCP-->>LLM: Detailed list of tools, resources, and prompts

    LLM->>MCP: 3. Call tool (tools_call)

    alt With OAuth2
        MCP->>API: Request OAuth2 token
        API-->>MCP: Access Token
    end

    MCP->>API: 4. Execute API call with proper formatting
    API-->>MCP: 5. API response (JSON)

    alt Type Conversion
        MCP->>MCP: 6. Convert parameters to correct data types
    end

    MCP-->>LLM: 7. Formatted response from API

    alt Dry Run Mode
        LLM->>MCP: Call with dry_run=true
        MCP-->>LLM: Display request information without executing call
    end
资源和提示
服务器自动生成全面的元数据,以增强AI集成:
资源
- 基于模式的资源: 自动从OpenAPI组件模式派生
- 结构化URI: 资源使用一致的URI注册(例如。,
/resource/{server_name}_{schema_name}) - 类型转换: OpenAPI模式转换为MCP兼容的资源定义
- 元数据丰富: 资源包括服务器上下文和分类标签
提示
- API使用指南: 解释可用操作及其参数的一般提示
- CRUD示例: 自动生成的创建、读取、更新、删除操作示例
- 情境指导: 带有参数描述和使用模式的操作特定提示
- 服务器特定品牌: 对于多API环境,所有提示都以服务器名称为前缀
益处
- 增强的可发现性: 人工智能代理可以更好地了解可用的API功能
- 使用指南: 提示提供了如何使用每个操作的清晰示例
- 类型安全: 资源模式确保正确理解数据结构
- 情境感知: 特定于服务器的元数据有助于实现多API集成

📊 性能与生产
性能特征
- 快速启动: 约2-3秒后初始化
- 内存不足: 约50MB基本内存使用量
- 并发请求: 同时处理多个API调用
- 缓存: 自动OpenAPI规范和身份验证令牌缓存
生产部署
# Docker production deployment
docker-compose up -d

# Or with custom configuration
docker run -d \
  -e OPENAPI_URL="https://your-api.com/openapi.json" \
  -e SERVER_NAME="your_api" \
  -e MCP_HTTP_ENABLED="true" \
  -e MCP_HTTP_PORT="8001" \
  -p 8001:8001 \
  openapi-mcp:latest
监控
- 健康检查端点:
GET /health - 通过结构化日志记录的指标
- 使用JSON-RPC错误代码进行错误跟踪
🔍 故障排除
常见问题
❌ RequestHandler.prepare_request() missing arguments
# Solution: Use fastmcp_server.py instead of server.py
python src/openapi_mcp/fastmcp_server.py  # ✅ Correct
❌ Claude Desktop看不到工具
# Check configuration location
ls ~/Library/Application\ Support/Claude/claude_desktop_config.json

# Restart Claude Desktop after config changes
❌ 端口8001上的连接被拒绝
# Check if server is running
lsof -i :8001

# Check server logs for errors
❌ OpenAPI URL的SSL/TLS错误
# Update certificates
pip install --upgrade certifi httpx
测试工具
测试服务器初始化:
python test_weather_oslo.py使用mcp远程进行测试:
npx mcp-remote http://127.0.0.1:8001/sse检查可用工具:
curl http://127.0.0.1:8001/health环境问题
Python版本不匹配:
# Ensure Python 3.12+
python --version

# Recreate virtual environment if needed
rm -rf venv && python3.12 -m venv venv
缺少依赖项:
# Reinstall requirements
pip install --upgrade -r requirements.txt
🤝 贡献
- 分叉此存储库
- 创建要素分支:
git checkout -b feature/amazing-feature - 提交更改:
git commit -m 'Add amazing feature' - 推送到分支:
git push origin feature/amazing-feature - 打开拉取请求
📄 许可证
审计
](https://mseep.ai/app/gujord-openapi-mcp)
明星历史
如果你觉得它有用,请给它一个⭐ 在GitHub上!
